Scottish 6 Days
Armchair training

1- Glen Feardar East, long leg on M45
Credit:
S6D Routegadget
The tricky and technical terrain at the Scottish threw up all sorts of scope for errors...and happen they did. Here is a selection of Routegadget excerpts showing pitfalls that lay in wait for those who represented us up there. How would you have tackled the legs in question? Training pages
Note: as ever, to magnify the size of the images, in this case map excerpts, click or touch on them depending on the device you are using.
Q1- A long leg, at Glen Feardar East
How would you tackle this long leg, from the 8 on the east side of the map to 9 in the west? Variants of this leg appeared on several of the longer courses. Would it make any difference if I mentioned that some of the rough open areas were carpeted with heather concealing stones and rocks? Some runners were able to glide/ bounce over this stuff, others were reduced to picking their way through carefully. Mindful that by Day 5 I still hadn't run a long leg successfully, I spent two minutes standing still planning this one...and I didn't make a bad job of it.
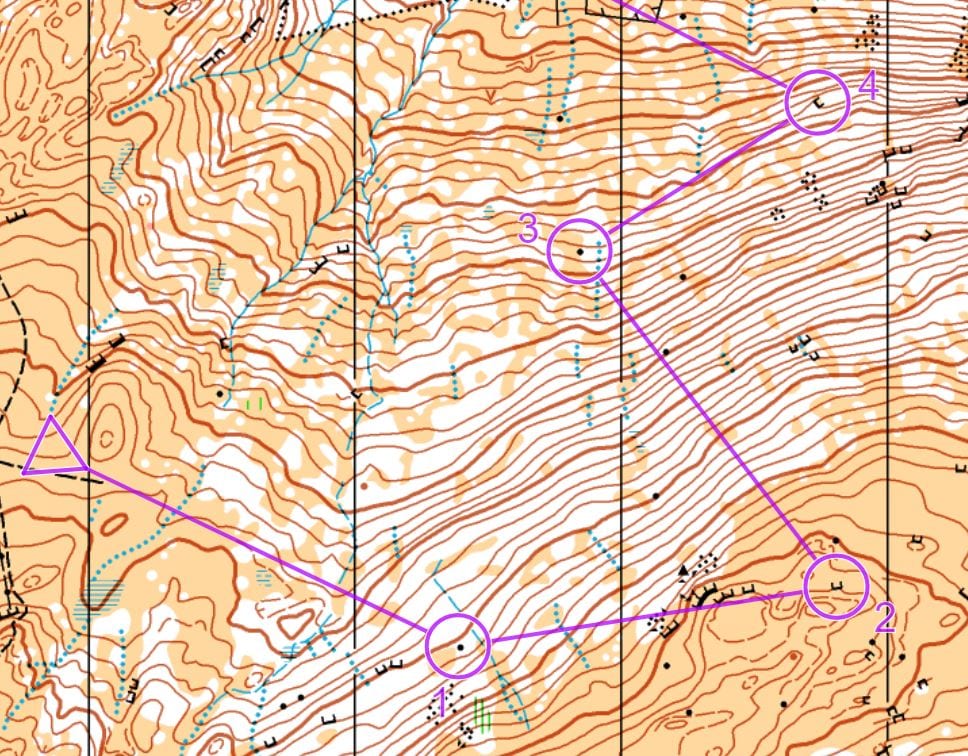
Q2- Steep semi-open woods at Creag Choinnich
No, 2 to 3 is not a piste, despite the ski slopes in this part of the world! This downhill leg was nearly 40% in gradient with 160m of descent. With no substantial catching features immediately behind the control, is there a safe route to ensure you hit your target? And while we're on this one, what features would you aim to tick off en route to controls 1 and 4? A "busy" area in terms of the huge number of small clearings, could you use these reliably to navigate? These legs were part of my M45L course and I navigated this section well but slowly, before failing to cope with a long leg that followed!
Q3- Rock and earth features at Birsemoor Hill
There were rocks everywhere! Bear in mind that only rock features taller than one metre were mapped - I believe. I found this out retrospectively after making a botch job of this part of the course! The re-entrants and knolls were tough to navigate through also.
How would you keep on track between the controls shown? What would your attack points and catching features be? Or would you be better off just "straight lining" it? How effective is pace counting here likely to be?

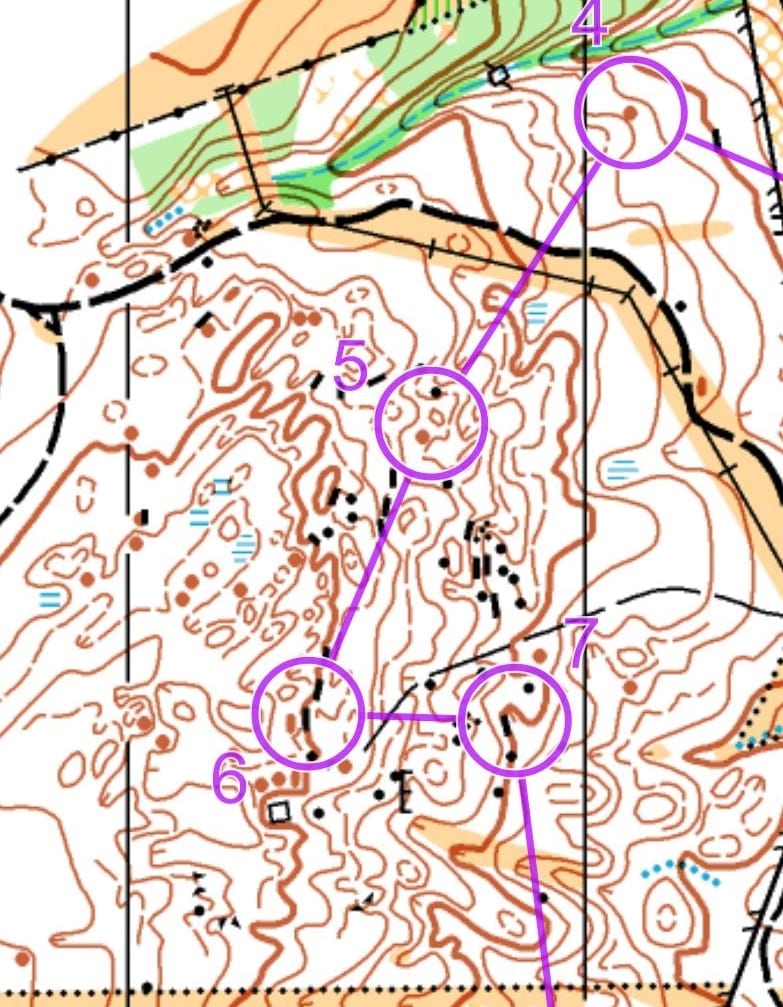
Q4- Change in pace & direction, Creag Choinnich
You've just bombed it round the first five controls in a lovely area of runnable wood and passable marsh with no problems. Why might control 6 present problems then? It's certainly a change in pace as your controls so far have been 'middle distance' style controls - point the compass at your target and run hard!
What sort of errors could be made immediately after leaving 5? Say for example you'd gone off 90 degrees out and climbed the wrong hill, how would you determine your new position and relocate? Bear in mind that in a wooded area like this even quite large features are often not visible till you're near them or approaching them from the right angle.
Next time you get lost, remember even the better orienteers and even the best can mess up what on paper looks a reasonably straightforward leg, as happened here on Day 4.
- Jeff Pakes