Maps for printing
from Purple Pen
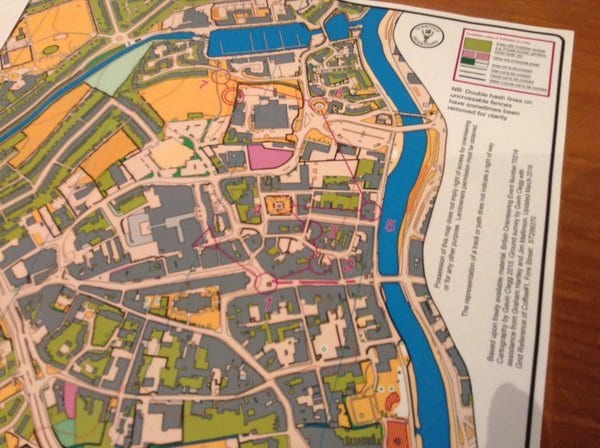
Bridgwater Map
This guide provides a step-by-step approach to obtaining an event-ready set of maps from the Purple Pen file you've set up to plan courses on.
Purple Pen Software- Finishing the map ready for printing
The courses are all finalised and agreed so it’s time to produce the event maps that will be used by the competitors. Obviously these need to be clear, accurate, and consistent between events. It is the responsibility of the planner, with checking and approval of the controller, or other nominated official/mentor for each event to ensure the finished maps are all to this standard.
Purple pen (PP) is being continuously updated and improved by the manufacturer so it is essential before anything else that the user has the latest up to date version- this is a free download.
The following is a checklist of items, all completed in PP, to produce the final event maps ready for printing. Note that they are not in any particular order, but this would be a logical sequence to follow:
1) Ensure the map used is the correct one! Whether Ocad or pdf, ensure the very latest is the one used in the final PP file especially when lots of updating has been done by the planner and/or mapper. Check the scaling is correct- QO often offer the junior courses at a larger scale than the senior ones. To do this, two base maps at different scales are used with two separate PP files, one for each base map. Ensure print scales are selected accurately in each file.
2) On the all controls heading, ensure all CDs are accurate and complete. This includes a description for the location/description of the START kite, distance, height and name.
3) The event name and date (E.g. QOFL1 01/02/2018) needs to be inserted, in purple, using a text line somewhere prominent and ideally at the top of the map on all courses. In addition all individual courses need a title in large purple text (add, text, insert special text, course name- this will add correct course name according to your chosen names on all course maps in the same place) Move the course name around to a suitable place so it is prominent but does not obscure anything below- use a white out area box behind any text line if necessary it to ensure it is prominent but pay attention not to obscure important detail below.
4) Control circles- Make sure they the right colour and are the right size for the map scale used and look aesthetically correct. The appearance can be amended using the ‘customize appearance’ command with in the ‘event’ menu. Make sure the centre of the circle is EXACTLY over the correct location and agrees with the CD. Use the zoom facility to check and move it accordingly if necessary. Break the circles, multiple times if necessary, so that any other feature(s) close by that could be used to aid navigation is/are not wholly/partially obscured by the circle. Ensure in the CDs that the position of the control relative to any identical feature to that used by the control within or partially within the circle is clearly defined in column#3 of the CD table (e.g. N most, SW most etc.). Remember ‘crossings’ and ‘junctions’ require a second descriptive symbol in column 5. Check for ALL courses
5) The above information regarding positioning applies to the START and FINISH locations as well.
6) Lines between control circles- ideally these are shown as straight lines but where the line obscures useful detail below, they can be adjusted to avoid this using the bend line or gap command. This is particularly important on junior courses following straight tracks etc. The bend or gap command can be used singly or multiple times on any given line and dragged as required to provide the best looking solution. Check for ALL courses.
7) Numbers- PP automatically locates the CD number ‘somewhere’ close to the circle. This may not be ideal for many reasons. The numbers can be dragged around to a more suitable position as required (to avoid obscuring detail below, avoid ambiguity between closely spaced circles etc.) To ensure the numbers show up well on dark (green usually) backgrounds, use the white outlining feature in ‘customise appearance’ command. A 0.1-0.2mm outline shows well.
8) For any road crossings, timeouts etc. add text lines within the CDs accordingly (to insert, highlight the CD line after which the text needs to be added, then command: add, add text line, position=below etc.)
9) Appearance of the courses is subjective, but as a starting point use the following settings in the ‘event, customize appearance’ settings from the menu: use IOF sizes, use regular control number style, 0.25mm white outline, 3.5mm auto leg gap, scale items to map scale, 100% magenta (others zero), descriptions= black. You may need to adjust some these settings if you are using larger scales for junior courses.
10) Add the CDs table in a suitable location, usually an unused part of the map. Try not to obscure detail- at worst, place the CD table over a key if provided, as most regular competitors do not need reference to this. For consistency, QO maps will use the black colour for the CDs- try to use the same location for all courses if possible. Try to keep the CD table a reasonable size that can be read easily by all competitors (nominal box dimension between 5 and 7 mm), and preferably in one single table- This may not be possible of course especially for longer courses with many controls- for these it’s possible if necessary to split the table into 2 or 3 to suit. Note that for all QOFL events and above, QO policy is that all courses Light green and above use pictorial descriptions, orange and below use textural.
11) Add a text line (again on a whiteout area if necessary) on ALL courses to state: “Courses close and controls will be removed from ‘xx’ p.m. Report to download by then.” Ensure the time inserted has been agreed with the organizer and matches that stated in the final details if stated.
12) Add any last minute OOB areas, water points (if provided), forbidden routes (usually along roads etc.) etc. from the special items dropdown list as required. These commands are universal i.e. if added to any one course, all other courses are amended identically.
13) Check and re-check again. Once satisfied (both planner and controller) then produce the PDF files for printing (check print area and settings are all correct). Check the resultant PDFs in a pdf viewer.
14) Produce the data interchange file (IOF XML) from the main file menu and send to the SI manager for the event to enable event setup in the timing software.
15) Sit back and enjoy a nice cup of tea.
Note: the text position will be the same on all courses.
- Andy Rimes (September 2018)