Technical Difficulties
Orienteering courses hang on Technical Difficulties. They dictate everything from control siting to length of legs.
For JOG purposes, we are concerned with TD1-4.
| Hare | TD1 |
| Squirrel | TD2 |
| Badger | TD3 |
| Fox | TD4ish |
The 'ish' on Fox is because we often do training exercises that mean they don't match up with the TD descriptors.
As a planner, you need to refer closely to the following documents:
You'll need to have them to hand throughout this training. We tend to make the courses a bit shorter than the equivalent colour courses for JOG as we deal with younger children.
Sustained Difficulty
A premium quality course has all legs of the same difficulty. However, that is rarely achievable due to the nature of the area. It might be that an occasional leg of a lower TD is needed to set up another quality leg.
It is vital, however, that no legs of higher difficulty crop up.
Quick Task
Look at these four images. Each is a section of a course. Work out which Technical Difficulty each is.


Once you've made your decisions, scroll down for the answers...
Image A
Controls joined by obvious linear features (paths). Controls on linear features. A couple of decision points between controls. TD2
Image B
Controls joined by obvious linear features (paths). Controls on linear features. A control at each decision point (between #1 and #2 there is a minor path leading off to the left, but the course goes straight ahead along the main track so this doesn't count as a decision point). TD1
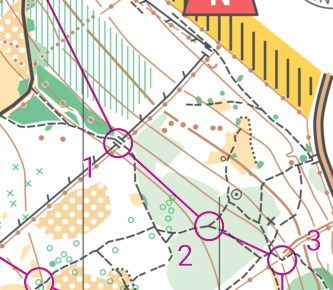
Image C
Controls not linked by linear features. Controls not on linear features but with a catching feature close behind. TD4
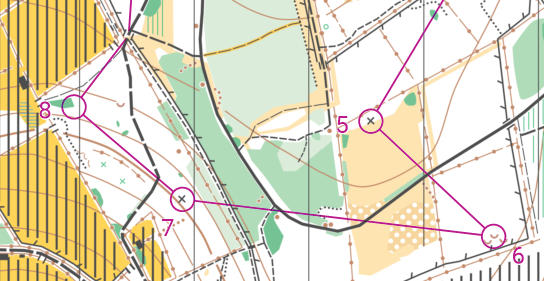
Image D
Controls linked by linear features, though quickest route may be a shortcut cross-country. Controls on linear features, albeit less obvious ones. TD3